Chicken Dum Biriyani
I have been on hunt to replicate Biriyani done by Tamilnadu Bhais – finally found recipe which is satisfied me the most. I have tried 10+ styles but this is the most I liked.
The original recipe is here in the video https://www.youtube.com/watch?v=W3OAwnhZNUQ
Ingredients:
- Chicken 1Kg
- Basmati Rice 1Kg (Soak in water for 2hrs)
- Onion -400g
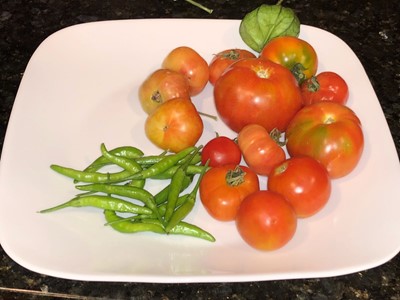
- Tomato-400g
- Oil -200g
- Pattai -1g / Cloves1g / Eleachi 1g (Full, don’t grind them)
- Cilantro- 1/2 Bunch (Chopped)
- Mint -1/2 bunch (Chopped)
- Green Chili -3Full (don’t cut them)
- Kashmiri Chili Powder-2Tbsp
- Ginger -100g & Garlic-50g (Paste them in mixer)
- Curd -200ml
- Salt -2Tbsp
- Water -800ml
For Marination (Optional)
- Ginger Garlic Paste – 4 Tbsp
- Red Chilli Powder – 2Tbsp
- Curd – 200ml
- Salt – 1Tbsp
Chicken Marination Preparation
Mix Ginger Garlic paste, Chilli powder, Curd & Salt into bowl. Add Chicken into bowl and marinate for 4hours. Marination will ensure all flavors goes inside the chicken and tastes slightly better. This is optional step
Rice PreCooking:
- Boil 3 liter water with 1Tbsp salt
- Once water started boiling. Don’t add rice before water starts boiling.
- Add Rice and boil only for 2mins or max 3mins – depending on rice (this is good enough to start dum process)
- Drain water and keep the partially cooked rice. Also keep the water for Dum process
Biriyani Cooking Method
- In big sauce pan (see picture) add oil and onions and fry them till brown.
- Add Cilantro and Mint and continue to fry them. Sauté for 1min.
- Add full green chilli & add Salt. Sauté for 1min
- Add Red chili power now, to get better coloring and the colors will spread evenly via oil. Continue Sauté for 1min
- Add ginger garlic paste and continue sauté for 1min
- Add curd and continue sauté for 1min
- Add Tomato and continue sauté for 1min
- Add Water (800ml)
- Close it with Tight lid
- Keep it in low flame for 5mins slow cooking. Now start the rice precooking process
- Add chicken now and cook for 2mins
- DUM Process: Add Precooked rice (instruction below) and boil for 15mins in low flame (slow cook process). Close it with Tight lid and add weight on top.
- Open and check whether rice is fully cooked. Add 5mins, if rice is under cooked.
Notes: I find biriyani taste even better the next day morning.